Teaching Strategies
From my research and from the content knowledge I gained in the Biodiversity seminar, I know that it is imperative that students learn about the causes and effects of humans on the environment and how they as children can contribute and make a difference. The goal is to foster a love for science to help students encounter the world at a deeper level, and to possibly set a course for future science careers. This unit will be taught during my 45-minute science block, over a four-week period. My unit activities will be using various strategies that will ultimately lead up to students creating wildlife corridors of forest habitats with a major focus on our local woodland habitat of the Pocahontas State Park in Virginia.
Science Notebooks
What it is: A science notebook is a collection of writing and drawing, done by the student usually in a one subject notebook. Science Notebooks are a tool for recording learning. They are a permanent place to record thoughts, data, and drawings about observations and experiments, as well as results based on experiences.
Why do it: Writing notes can help a student understand and remember the “what happened” of each science lesson. A science notebook can encourage students who are not scientifically minded but like to write or draw. Also, recording vocabulary words in a science notebook provides a reference for future use. Vocabulary words are essential for grasping foundational science concepts and deepening comprehension. Learning vocabulary words also increases students’ ability to think, reason, draw conclusions, and communicate effectively. They can also reinforce reading and writing skills.
How it is done: The students will record or reflex by writing or drawing in their science notebooks after each lesson, independently or with a small group/partner. Be sure to have students organize each entry. Use headers like: Observations, Predictions, Experiment Process, and Conclusions.
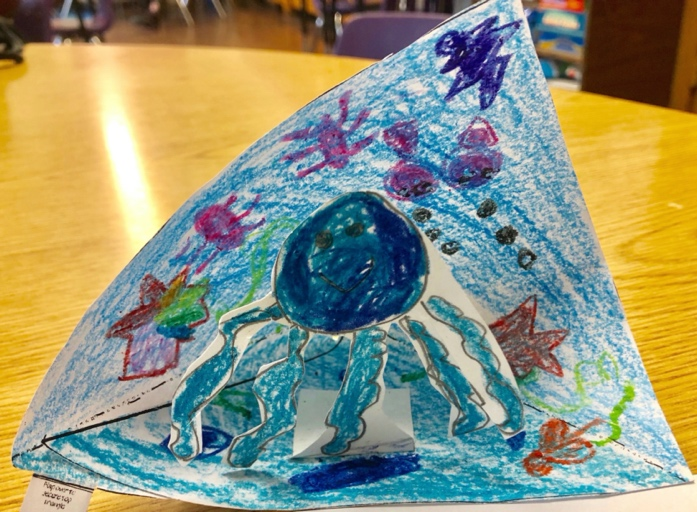
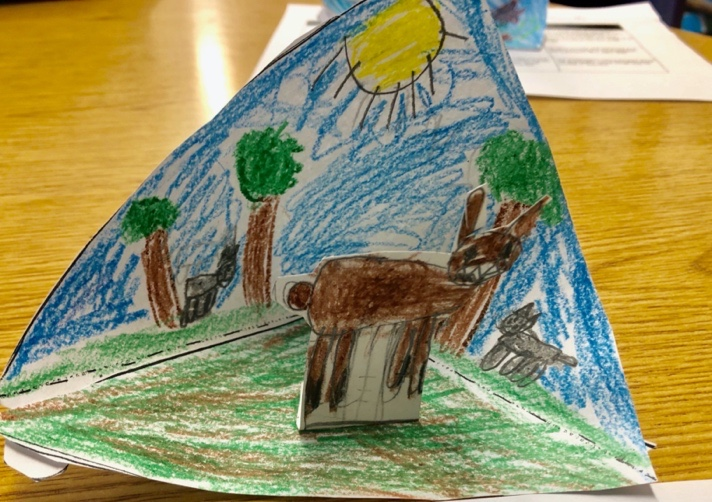
3D Paper Habitat Diorama
What it is: A 3D paper habitat diorama is like a small model or stage set of a particular habitat made from a folded paper model.
Why do it: Creating 3D paper habitat dioramas will give students an opportunity to display biodiversity and use their creativity to discover and apply knowledge learned about what organisms live in which habitats.
How it is done: The students will use a 3D paper model template and cover the background with colored scenery and include organisms made with index cards or cardstock that live in that particular habitat. See Figure 4 and 5 below.
|
|
|
Anchor Charts
What it is: An anchor chart is a visual aid hung in the classroom with information they can use as a reminder on a particular concept. They give detailed overviews and information about that concept. Anchor charts can include illustrations, diagrams, and key vocabulary words.
Why do it: Students are usually successful when they have a visual to go back and reference to when they are completing a task or preparing for assessments.
How it is done: Anchor charts are usually made on large chart paper. They are most effective when they are made by the teacher with the students. When students can help the teacher create the charts, they have a deeper understand and retain the information better.
Paper Plate Food Chain Models
What it is: The students use small paper plates linked together with pieces of yarn to create food chains.
Why do it: Students use their artistic abilities to illustrate and apply knowledge learned about how energy flows through a food chain, and also use vocabulary that identifies organisms and their place in food chain. It will also show if students fully understand who eats what in a particular habitat.
How it is done: Each plate should have an illustration, label, and indicate the part of food chain it represents (producer, consumer, decomposer, herbivore, carnivore, omnivore). With the use of a single hole punch, loop and tie the pieces of yarn to each plate linking them together in the correct order to display the food chain. See Figure 6 Below.
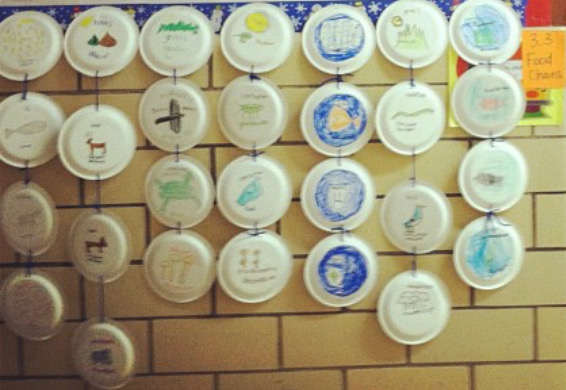
Figure 6 Paper Plate Food Chain Models
Food Chain Circle Book
What it is: Circle templates that allow students to freely illustrate their given habitat and the organisms that live there. It also gives the opportunity to apply knowledge of key vocabulary.
Why do it: Students use their artistic abilities to illustrate and apply knowledge learned about food chains and key vocabulary that identifies organisms and their place in food chain.
How it is done: Each page of the book has an illustration, label, and indicate the part of food chain it represents (producer, consumer, decomposer, herbivore, carnivore, omnivore). Cut out pages and staple together. See Figure 7 below.
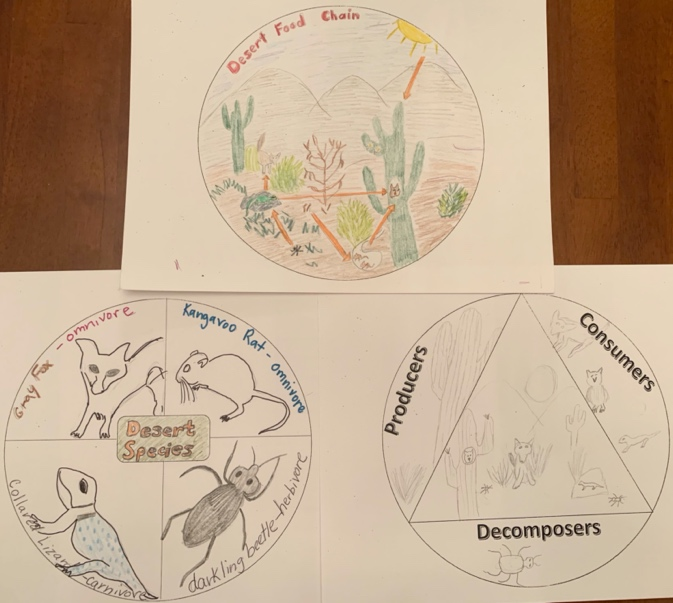
Figure 7 Food Chain Circle Book
Nature Walks/Crossover Learning
What it is: Students are given the opportunity to learn in multiple settings.
Why do it: Students get a hands-on, interactive, kinesthetic method of learning by being outside the classroom. A change of environment can be really refreshing. This activity gives them a chance to explore the and make connections with previous lessons and spark questions they may have and even answer ones they may have already had.
How it is done: Teachers can propose questions inside the classroom, and then taking students to informal settings to find answers and then, going back to classrooms to discuss and share the findings. This way, learners can record, link, recall and share their diverse learning events to explore the topic and get a deeper level understanding. Students should record their observations in their science notebooks
Graphic Organizers/Circle Maps
What it is: Templates that help students organize information, and visually represent different thought processes which help organize with a better flow.
Why do it: Graphic organizers have a central point that branches are formed and there are sometimes sub-branches that help students organize their information which ultimately helps ensure comprehension.
How it is done: Students should complete graphic organizers when researching information or during or after a lesson.
Virtual Learning Games and Videos
What it is: Games and videos online that teach and give students opportunity to practice applying knowledge and skills learned in class.
Why do it: Online games and videos are very engaging to young students especially, as this is a technology-driven generation.
How it is done: Students should be able to navigate through proper sites to locate assigned games according to lessons provided by the teacher.
Role Play Game
What it is: Students will role play the difficulties animals face moving across a landscape.
Why do it: This will give students a kinesthetic way to understand the importance of wildlife corridors.
How it is done: Appoint Group A students as different animals: e.g. frog, deer, beaver, bear etc. Appoint Group B students as barriers to movement: e.g. A barbed wire fence, cars on a busy road, buildings, a back yard with an aggressive dog. The objective of the game is for Group A students to move from one side of the classroom or playground to the other by staying in character e.g. frogs can only hop, deer can walk but not climb, etc.
Wildlife Corridor Project
What it is: A project that will display students understanding of how to create safe places for organisms to thrive and survive in their natural habitats.
Why do it: this project will help students to practice being caretakers of the environment by creating simple solutions to a growing problem in our ecosystems that are threatening biodiversity.
How it is done: Students will create a wildlife corridor for an animal of their choice by either drawing it out on large poster board or creating a 3D model using boxes or other items of their choice.
Comments: