Teaching Strategies: Constructing a Windmill
There are many ways we can obtain, store, or transfer energy and to discuss them further would exceed the scope of this unit. The above background information summarizes a general understanding of energy and energy resources. From here on, we will follow Kamkwambe's journey in the construction of a windmill using spare parts and knowledge of electricity. The four elements of the next section will be dedicated to information related to the construction of a device that will harness the wind and convert it into electrical energy. A windmill. The four phases of this project have been divided into four sections: tower construction, turbine construction, electrical generator construction, and circuit construction.
Electrical Generator Construction: In the nineteenth-century, British physicist and chemist Michael Faraday made the first electric generator, called the dynamo, as well as the first electric motor. “In Michael Faraday's generator, coils of copper wire rotating between the poles of a magnet produce a steady current of electricity. One way to rotate the disk is to crank it by hand, but this isn't a practical way to make electricity. Another option is to attach the shaft of the generator to a turbine and then let some other energy sources power the turbine. Falling water is one such energy source, and, in fact, the first major plant ever built took advantage of the enormous kinetic energy delivered by Niagara Falls.”[1] Many electrical generators take advantage of steam, which will transfer energy to a turbine and on to a generator. The most popular way to make steam is to heat water by burning coal or natural gas, but it is possible to use other methods such as controlled nuclear reactions or solar energy.
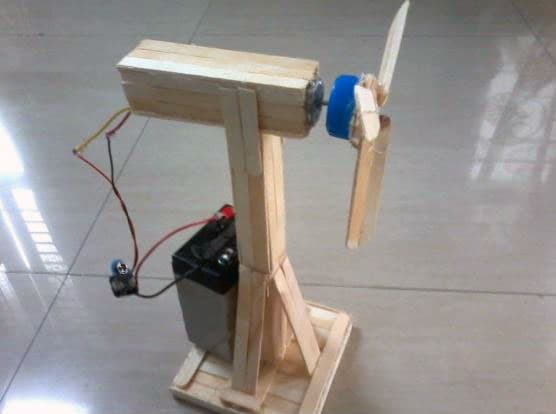
Kamkwambe needed an electrical generator to turn the mechanical energy of the spinning turbine into electrical energy. He used a device invented by Faraday known as a Dynamo. Kamkwambe acquired his from a bicycle headlight, the type that would light up as the rider pedaled. Making a do-it-yourself generator is possible, although this may present one of the greater challenges for 4th graders to make on their own as it involves wrapping very tight copper wire coils. In my class, I will have several low voltage DC electric generators on hand that students can use pre-assembled, just like Kamkwambe. They are 3V to 12V dc motors, so the combination of lights and buzzers added to the load should be more than 3V and under 12V. These motors can be found in bulk rather inexpensively and are worth the investment. If you elect to have students make a generator from scratch, at least have a few of these on hand for teaching purposes.
I may elect to have some students make their own generator if they are ready for the challenge. The web site Instructables.com has an excellent, step-by-step guide titled “Electric Generator Powering LEDs” and at the time of this writing, can be accessed at www.instructables.com/id/Electric-Generator-Powering-LEDs. It an excellent guide, but I highly recommend adult help with this task.
Buy the generators. They can be a useful item to stock in a STEM class. Make the generator on your own before introducing it to students.
Circuit Construction: The leads or wires coming off the generator are sufficient to attach to a small device or light that operates on DC, or direct current electricity. The generator produces a continuous flow of electrons from negative to positive through a conductive material such as a copper wire. The direction of the current is opposite the flow of electrons and will be necessary to match polarity correctly to power an LED or buzzer. Positive connects to positive and negative connects to negative. You can have students use a wire (I recommend using a type with insulated alligator clip connectors) to connect to the leads on a light or a small buzzer. I use small 3V to 24V electronic buzzers that have red and black wires attached to them. They can be obtained in bulk rather easily and inexpensively. The same with any LEDS, 3 volts is sufficient.


I teach students about electric circuits by first attaching the leads of an LED to a CR2032 coin battery. Students observe that one way it lights up, but switch the leads and it does not. This is an excellent talking point to hold an initial discussion about electric circuitry. I demonstrate that I can also connect those leads to an index card that has copper lines taped from the top of one side, all the way down the middle of the long side, and overlapping the edge by about an inch. On one side is the battery, and when I fold the card, the overlapping copper line connected to the battery completes the circuit, and there is light or sound.

On a sheet of paper at least 3” x 5”, but can be larger, I have students create a circuit using copper tape (sometimes found in a gardening store as a natural slug repellent, or in craft stores for stained-glass supplies), a battery, and an LED or buzzer. Having a model like the one pictured is useful and students can either copy it or create their own. In my experience, even insecure students don't mind starting with a copy of the model but are often excited to go off and try their version after that initial success.
After they have completed their circuits, they can extend their learning by creating lighted models, animated greeting cards, and artwork or writing pieces that light up.
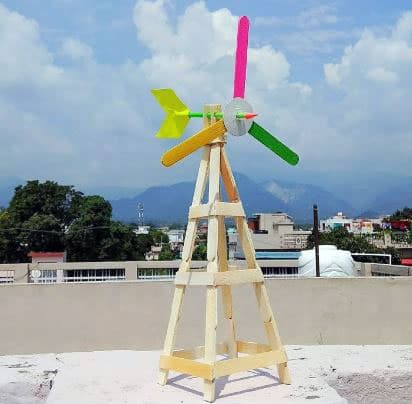
Turbine Construction: Students can design and cut out the turbine blades using construction paper, card stock, or thin cardboard like the kind cereal boxes are made from. They can experiment with different designs, shapes, and sizes to find what works best. Another alternative is to purchase pinwheels and use the blades as your turbine. I was able to locate a variety of different styles at a local dollar store.

Tower Construction: The tower needs to be tall enough to hold the spinning turbine off the ground, as well as be balanced enough to hold a spinning turbine without falling over. A simple truss tower with a wide base should work, but at this scale even a well-supported straight tower should be sufficient. I recommend using straws with interlocking connectors or craft sticks. Attention will need to be made to designing a section that holds the turbine in place.
Comments: