Teaching Strategies
Number line.
Different students use different ways to understand and memorize math concepts. I have observed that most of them are visual learners. Therefore, one of the best tools to study arithmetic is a number line. “The number line is a terrific tool for helping us understand arithmetic in terms of geometry. This can help you get a much more unified picture of what arithmetic is about than working only in symbols, and it can help arithmetic make more sense.” 3This will help students to look at the fractions as part of a unified system rather than a separate concept. So, the first stop in our wonderful journey to the magic world of fraction will be a number line. We should actually build a number line.
To define a number line, we start with an unmarked line “(see Figure 1).”

Figure 1
Next, we choose a “starting” point – a point to be the origin or zero point- and a unit length “(see Figure 2).”

Figure 2
It is a very important thing to emphasize is that the number line is about length: a point is labeled by the number that tells how far it is from the origin, as a multiple of the unit distance “(see Figure 3).” I will make sure that my students are clear about it before doing anything more advanced.

Figure 3
Students should also have a clear understanding that a number line continues indefinitely in the positive (to the right of the origin) and negative (to the left of the origin) directions according to the rules of geometry which define a line without endpoints as an infinite line. The integers are often shown as specially-marked points evenly spaced on the line. Although most of the time we only label whole numbers on the number line, it is actually made up of all real numbers including fractions. The same concept with length can be used to label fractions on the number line.
Example 1: to put an interval of length 1⁄2, we divide the unit length between 0 and 1 by two “(see Figure 4).” Then, each piece has length 1⁄2. The number “1⁄2” goes at the end of the segment of length 1⁄2 starting at 0.

Figure 4
Example 2: to put an interval of length 1⁄3, we divide the unit length between 0 and 1 into three equal pieces. Then, each piece has length 1⁄3“(see Figure 5).” Similar to the situation with halves, the number “1⁄3” goes at the end of the segment of length 1⁄3 with its other endpoint at 0.

Figure 5
Putting fractions on a number line is a challenging task for many students. Mostly they struggle with figuring out how large or small a fraction is. To solve this problem, students need to know how to compare fractions. I plan to focus on the two major concepts. The first thing to realize is that if the numerator of a (positive) fraction increases while the denominator stays fixed, then the fraction increases. For example,
1⁄3 < 2⁄3 < 4⁄3 < 5⁄3
To help my students visualize this concept, I will place all these fractions on the same number line “(see Figure 6).”

Figure 6
To the contrary, if the numerator stays fixed and the denominator increases, then the fraction decreases.
For example,
1⁄4 < 1⁄3 < 1⁄2
To connect this concept to the real life I suggest that my students imagine one big pizza that they need to share with five friends, or with their four friends, or with their three friends, or two friends. Then I ask them in what case their slice will be the biggest. They never fail. They know that the less people want to eat their pizza, the bigger portion of the pizza they will enjoy. This real-life example creates a good mnemonic rule of this not so obvious math fact. In addition to that, I will get my students place all these fractions on the number line to reinforce the concept that the number line is about length: the smaller the length is, the closer the number is to the origin “(see Figure 7).”

Figure 7
Bar and Area Models.
One of the cornerstones of students` literacy in fractions is the idea that different fractions that look different can represent the same number, that is, are equal. This is the bridge to the arithmetic operations with fractions with different denominators. I will start teaching this concept with a bar model that lets students clearly see how it all works. The top rectangle is divided into two equal pieces, so the yellow region represents 1⁄2.
Figure 8
The bottom rectangle is divided into six equal pieces, so the green region represents 3⁄6.
Since the areas of both rectangles are obviously equal, the conclusion that students will be led to make is that 1⁄2 = 3⁄6 “(see Figure 8).” This can also be illustrated systematically with the number line.
Another way to show the same is a circle. Let`s draw a circle and divide it into four equal parts.
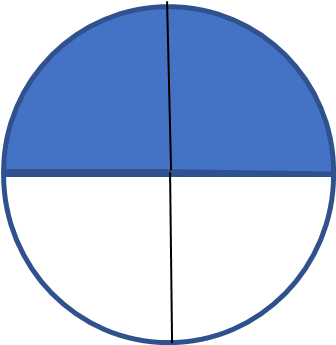
Figure 9
Two of these parts (the blue region on top) make half of a circle, so we can conclude that 1⁄2 = 2⁄4 “(see Figure 9).”4 Students need to have a clear understanding of the fact that dividing (or multiplying) the numerator and denominator of a fraction by the same non-zero number will always yield an equivalent fraction. We will be using this important property to add and subtract fractions with different denominators, as well as reducing a fraction to the lowest terms. It is helpful for students to realize that on the number line equal fractions are represented by the same point “(see Figure 10).”
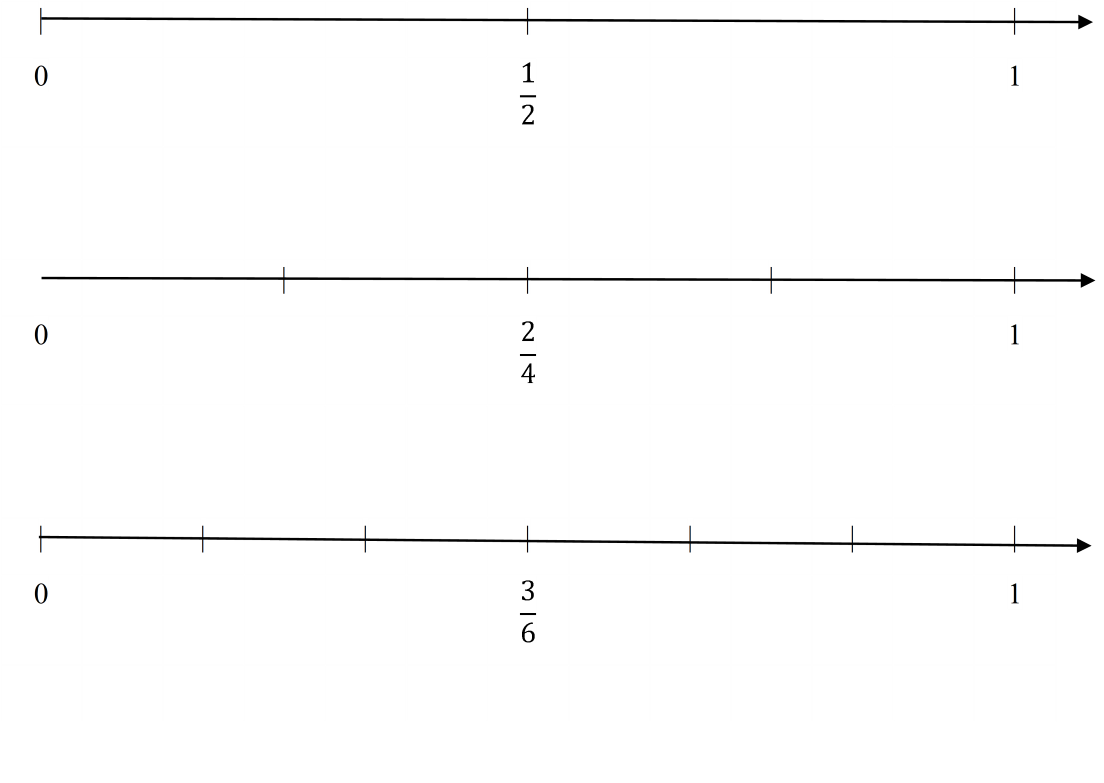
Figure 10
Now it is time to make a general statement that if we multiply both the numerator and the denominator of some fraction by the same number (not equal to zero), the result will be the fraction equal to the original one.

The same is true if we divide both the numerator and denominator by the same number (not equal to zero). This is also known as writing a fraction in lower terms.
Arithmetic operations with fractions.
Developing good skills with equivalent fractions is essential for teaching how to compare, add and subtract fractions with different denominators. However, in the beginning we should practice comparing, adding and subtracting fractions with the same denominators. The rule of comparing fractions with the same denominators has been discussed above. To add fractions with the same denominators we just add the numerators, keeping the same denominator:

The same is true for subtraction:

Again, these operations can be represented uniformly on the number line.
Once students feel comfortable with adding and subtracting fractions with the same denominators, it is time to teach them how to do these basic operations with fractions with different denominators. This is a difficult task that requires time and effort, but it is essential for students` success not only in Math, but in Science and other Math-related subjects. So, I make the effort to be patient, thorough and persistent in teaching these concepts.
Multiplying fractions is a pretty easy task for my students as long as they know the rule: to multiply fractions, we should multiply the numerators and multiply the denominators of these fractions:

To visualize this rule for students using an area model can be effective.
“Problem 2. Suppose, the length of some rectangle is 4⁄5dm, and its width is 2⁄3dm. What is the area of the rectangle? “
To answer this question, let`s draw a diagram. To create such rectangle, we can divide one side of a square (whose
side length is 1 dm) into 5 equal parts and shade 4 of them, and the other side of a square – into 3 equal
parts and shade 2 of them. In this case the total number of equal parts will be 15, and the original rectangle will
be made up of 8 parts. So, the area of this rectangle will be equal 8⁄15dm3.
As we know, the area of a
rectangle is equal to the product of its length and the width. Therefore, we decide that  }}) . Let`s summarize
. Let`s summarize  }}) .” “(see Figure 11).”5
.” “(see Figure 11).”5
Square side = 1 dm


4⁄5dm
Figure 11
On the contrary, dividing fractions has always been challenging, since it is a multi-step procedure that requires a lot of practicing.

“Dividing by a fraction is the same as multiplying by its reciprocal.” 6
Note: A very special attention should be drawn to the fact that division by whole number b (not equal to zero) is the same as multiplication by 1⁄b and vice versa. This equivalence follows from the definition of 1/b. This is also a point worth making. Many students struggle with understanding of this concept. For example, each time I ask my students to name a slope of line y = x⁄4 + 3, their answers vary. Most common are: slope is equal to 4, slope is equal to 0, slope is equal to 1. Obviously, in this example they should understand that x⁄4 = 1⁄4 X x, so the slope of the line is equal to 1⁄4. It is easy to predict the struggle with linear functions, parallel and perpendicular lines, derivatives and many other topics in Math that comes simply from misunderstanding of the relationship between division by b and multiplication by 1/b. As we can see, “Fractions” is a substantial and challenging topic. The more persistent we, teachers, will be with this topic, the better results students will achieve.
Comments: